Cupcakes To Go

Today I am sharing some things that I learned while making these cupcakes that were used as wedding favors.   A few weeks ago I showed you the “Queen of Hearts” cookies that were for the bridal shower tea.  The wedding took place this past Saturday and I volunteered to make the cupcakes that the bride wanted as favors.

This past week was one of the hottest of the summer.  I was hot … and lazy … I relied on my old friend, Duncan Hines, once again.  I baked the cupcakes a few days ahead and froze them as usual.  Friday evening I made the icing … my decorator icing recipe  … you may want to check it out because I made a few slight changes.  Then I prepared the assembly line …

Since it was so hot and the wedding was outdoors … I had already planned to deliver the cupcakes in an ice chest to keep them cool until needed.

This is what I did … I baked the cupcakes in regular liners … then placed them in parchment paper cups (sometimes called tulip cups) … just to keep things neat …

I knew that if I iced the cupcake and then tried to put it in the “to go” box … I would surely have my fat fingers messing up the icing … or have smeared icing on the sides of the box.   So, I decided to put the icing on the cupcake after it was in the box …

I used Wilton tip #1M … started on the outside of the cupcake and swirled my way to the center …

And it worked!  I was so lazy, that I even bought ready-made icing flowers at the cake decorating store.  Maybe I should be embarrassed … but I’m not.

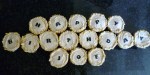
I closed up the boxes and refrigerated them overnight.  Saturday morning I tied the ribbons … put them in the ice chest … and drove them to the wedding.  Here is a pic of the first 20 …

I hope that these hints help you to make cupcakes to go!

Cookies for the Queen of Hearts

These shortbread cookies were made for a bridal tea with an “Alice in Wonderland” theme.  My niece, Brittney, is going to be a bridesmaid in a wedding and therefore helped organize a shower.  She wanted to make cookies … so “The Queen of Hearts” crown was our project.

We made my favorite shortbread cookies … for the recipe and directions click on “Cupcake Shortbread Cookies” on the right hand side of this screen.

After the cookies were baked and cooled we started decorating with royal icing.  I haven’t used royal icing in some time so I referred to http://www.sweetsugarbelle.com.     She has wonderful recipes and directions for royal icing.

First we outlined with black icing …

Then “flooded” with yellow icing …

Brittney did the decorating … she used pink disco dust, red heart candies and silver dragees (for decoration only) …

This is her creation …

The tea was last Saturday and the cookies were a big hit.

I ♥ comments … please leave one!

Wilton Sugar Sheets – Product Review

This gallery contains 3 photos.

Yesterday I said that I would show you how I “wrote” on the Peanut Butter Cupcakes.   Well, I cheated … I didn’t write anything.  I was at Michael’s a few weeks ago … had a coupon … and found this.   … Continue reading

Peanut Butter Cupcakes with Peanut Butter Frosting

Peanut butter cupcakes + peanut butter frosting = one happy hubby!  But I made these cupcakes for his brother’s birthday … and he was happy.

I made a few small adjustments to this recipe, but do not remember where it came from … so I can’t give credit to the creator … sorry.

Line your cupcake pans with 20 paper or foil liners …

In a medium-size bowl, whisk flour, baking powder and salt … set aside …

This is my favorite measuring cup for peanut butter … it’s from Pampered Chef, but there are others available.  I like the fact that it is clear and easy to tell if you have air pockets.   Then you just push the peanut butter out and don’t have to keep scooping and scraping …

In large mixing bowl and paddle attachment, beat together peanut butter and butter until smooth …

Add sugar gradually and beat until totally combined …

Continue beating for about 3 minutes or until mixture is a light tan color …

Add eggs, one at a time, beating well after each addition, about 2 minutes total …

Add the flour mixture, alternating with the milk, beginning and ending with the flour mixture …

Stir in the vanilla …

Scoop the batter into the lined cupcake pans … about 1/4 to 1/3 cup each … and bake …

For the frosting … in a medium size bowl, beat peanut butter and butter until smooth …

Mix in half of the confectioners’ sugar …

Alternate with milk …

Beat until smooth and no lumps remain …

Frost your cooled cupcakes …

Then roll the edges in chopped peanuts …

 Tomorrow I will show you how I “wrote” Happy Birthday on these cupcakes.

Peanut Butter Cupcakes with Peanut Butter Frosting

Cupcakes:

1-3/4 cups unbleached flour (or all-purpose)

2 teaspoons baking powder

1/2 teaspoon salt

3/4 cup creamy peanut butter

1/2 cup unsalted butter, softened (salted is OK)

1-1/4 cups sugar

2 eggs

3/4 cup milk

1 teaspoon vanilla extract

Frosting:

1/2 cup creamy peanut butter

1/4 cup (1/2 stick) unsalted butter, softened (salted is OK)

2-1/2 cups confectioners’ sugar

1/3 cup milk

1/2 cup chopped lightly salted peanuts, for garnish

1.  Heat oven to 350°.  Line cupcake pans with 20 foil or paper liners.

2.  Cupcakes:  In medium bowl, whisk flour, baking powder and salt.  Set aside.

3.  In a large mixer bowl with paddle attachment, beat together peanut butter and butter until smooth.  Add sugar gradually: beat until thoroughly combined, and mixture is a light tan color, about 3 minutes.  Add eggs, one at a time, beating well after each addition, about 2 minutes total.

4.  Add the flour mixture, alternating with the milk, beginning and ending with the flour mixture.  Stir in vanilla extract.  Divide batter evenly among prepared cups, about 1/4 – 1/3 cup for each.

5.  Bake at 350° for 25-27 minutes, or until lightly browned on tops.  Remove from pan and cool completely on a wire rack.

6.  Frosting:  In a medium bowl, beat peanut butter and butter until smooth.  Add half of the confectioners’ sugar, alternating with milk.  Beat until smooth and no lumps remain.  Spread over cupcakes.  Garnish with chopped peanuts.

Makes 20 cupcakes.

I ♥ comments!           Hoosier Homemade - Making Your House a Home

Cheesecake Bars with Sugar Cookie Crust

Summer time is birthday time for our family.  In a five-week span we celebrate the following birthdays … my hubby (the peanut butter addict), son #2, son #3, one nephew, one brother-in-law, one sister-in-law and mine!   My two sons’ birthdays are one day apart … not good planning on our part.  If we aren’t careful, we could suffer from birthday cake overload.  We have learned to have birthday dessert … not always cake.  This is one of those desserts!

Before we start … let me explain that I sometimes use mixes for cakes or brownies.  But, I always make cookies from scratch … never a mix … never ready made cookie dough … except for this recipe.  I have had this recipe for many years, it calls for ready made refrigerated sugar cookie dough.  After making these cheesecake bars several times, I thought it was silly to buy sugar cookie dough … so I made my own dough.  I don’t know why … but the cookies made with the ready made refrigerated dough won the contest.   I felt defeated … the Pillsbury Doughboy won … well, at least he’s cute!

I have altered the recipe to fit our family’s tastes … I live with picky people! Today we have one half blueberry and one half chocolate chip.

This is what you will need … sugar cookie dough, cream cheese, sugar, an egg, blueberry pie filling, chocolate chips and oil spray …

Spray a 9″ x 13″ pan … then press the room temperature sugar cookie dough on the bottom and slightly up the sides of the pan …

Beat the softened cream cheese and sugar in a bowl with an electric mixer …

Add the egg and beat until smooth …

It should look smooth like this … if you didn’t drop it on the floor like I did!  Good news … the mixer survived and it didn’t even crack a floor tile!

Spread the cream cheese mixture evenly over the crust …

Sprinkle chocolate chips over half of the pan to make Son #2 happy …

I can’t forget Son #3 … so dollop (that’s a technical term) blueberry pie filling on the other half …

Using a butter or dinner knife, swirl the pie filling with the cream cheese and press the chocolate chips in the cream cheese a little …

Bake … and cool completely before cutting …

The original recipe called for blueberry pie filling only … I like to add a little lemon zest in the cream cheese.  I am giving you the recipe for the way I made it … one half blueberry and one half chocolate chip.  This is one of those recipes that can be changed to fit your needs.  Have fun with it!

Cheesecake Bars with Sugar Cookie Crust

1 16.5 ounce package of refrigerated sugar cookie dough (room temperature)

8 ounces cream cheese (softened)

1 egg

1/4 cup sugar

3/4 cup blueberry pie filling (1-1/2 cups if making all blueberry)

3/4 cup chocolate chips (1-1/2 cups if making all chocolate chip)

1.  Press dough evenly in a greased 9″ x 13″ baking pan.

2.  In a small mixing bowl, beat cream cheese and sugar.  Add egg and beat until smooth.

3.  Spread cream cheese mixture over cookie dough.

4.  Dollop pie filling on half of the cheese mixture and sprinkle chocolate chips on the other half.

5.  Using a knife, swirl the pie filling and cream cheese mixture.  Press the chocolate in the cream cheese mixture.

6.  Bake at 350° for 35 minutes or until edges of crust are golden brown.

7.  Cool completely, cut into bars, refrigerate.

I enjoy comments!   Please leave one below …

Brownie Oreo Cupcakes

This was an experiment … I have made brownie cupcakes before and love the convenience of single servings, no cutting required … but I have never stuffed a Oreo in one.  I have seen many recipes recently with Oreos inside cupcakes, cookies and brownies, so I gave it a try.  I will do it again, but it will probably be an experiment again!

First of all, I must confess that I used a brownie mix.   You see my family prefers brownies from a mix over brownies from scratch.  So, I keep my family happy and my life simple!

I followed the directions on the box and filled cupcake papers with the brownie batter.  I got 13 cupcakes from a mix that made a 9″ x 13″ pan of brownies …

Then put the Oreos in the cupcake batter … and put them in the oven @ 350° for 25 minutes …

This is what happened … the Oreos that I laid on top of the batter, stayed … I stood 3 Oreos on end and 2 fell down …  next time I may do it differently … maybe pour a little batter in the bottom, place a Oreo on the batter and then cover the Oreo with more batter …

I made these cupcakes to take to a birthday lunch … they looked so plain … so I added a little dollop of icing …

They needed more … a few sprinkles “partied” them up … and I put them in individual cupcake boxes for everyone to take home …

These Brownie Oreo Cupcakes were very easy and tasted good.  Let me know if you try it this way or another … I always appreciate input!  Just leave a comment below ….

I listed this recipe on “it’s a blog party!”  … click on the image below to get more great recipes!