Marshmallows for the 4th of July

Today’s 4th of July marshmallows are so simple …

I did use a different brand of marshmallows this time.  The brand name is “de la Rosa” and they are flavored vanilla and strawberry!  They are available in two sizes, large and extra giant.  Here is a photo …

You will need marshmallows, candy melts or chocolate, sprinkles and lollipop sticks.  To make the glittery star you will need Starburst (or any other candy that will work for you), “Disco Dust” (non-toxic glitter available at cake supply stores) and a star cookie cutter …

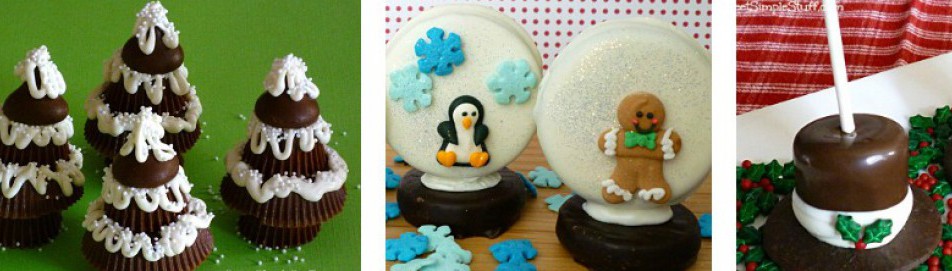
First melt your chocolate … put a stick almost all the way in a marshmallow (or 2 or 3 marshmallows) … dip it in the chocolate to coat …

Tap off the excess chocolate …

Add sprinkles …


Put it in a stand or styrofoam … pop it in the fridge or freezer for a few minutes to set the chocolate …

To make the glittery stars … flatten the Starburst candy … I used my fingers … cut out the star using the cookie cutter …


Now sprinkle the Disco Dust on the star … do this on a piece of parchment or wax paper so that you can reuse any excess dust … try to keep you fingers out of the dust … it flies everywhere!  The Disco Dust will stick to the candy automatically …


I dipped some marshmallows and did not add sprinkles before putting them in the fridge … use some melted chocolate to attach the star to the marshmallow …


Now use more melted chocolate (just around the edges) to add sprinkles …

Disco Dust comes in many colors … I love way it adds sparkle!

Visit tomorrow to see Sweet Slider Cupcakes!

Topless S’mores Bars

Do s’mores need graham crackers on the top and bottom?  I have been wanting to make a s’mores creation for some time … but I really wanted to see the golden marshmallow … the result is what you see … topless s’more bars.

Thank goodness for family … they are always willing to be members of  the “test kitchen” a.k.a. guinea pigs.   Normally I think of s’mores with warm marshmallows and melty chocolate … but the consensus was “refrigerate them to chill the chocolate” …  I agree.  I liked using the StackerMallows … they made perfect cutting lines for servings!

You will need StackerMallows, milk chocolate chips, graham cracker crumbs, sugar and butter …

Mix the graham cracker crumbs and sugar …

Melt the butter … mix it well with the graham cracker crumbs and sugar …

Press the crumb mixture into a 9″ x 13″ pan …


Sprinkle the chocolate chips evenly over the crust …

Lay the StackerMallows on the chocolate chips … don’t let the marshmallows touch the side of the pan … 30 marshmallows fit just right …

Pop them in the oven … s’mores need toasted marshmallows …

Topless S’mores Bars

2 cups graham cracker crumbs

1/2 cup sugar

3/4 cup butter (1-1/2 sticks)

2 cups milk chocolate chips

30 StackerMallows (about 1/2 of a bag)

Mix graham cracker crumbs and sugar.  Melt butter and stir into crumb mixture.  Spread mixture and press into bottom of 9″ x 13″ pan.  Sprinkle chocolate chips evenly over crust.  Lay StackerMallows in a single layer over chocolate chips.  Bake at 400° for about 12 minutes or until marshmallows are golden.  Cool or chill and serve.    30 servings

Creamy Lemon Ice

In celebration of the first day of summer I made my first batch of lemon ice … cold, sweet, creamy and fat-free!  I have had this recipe for many years … it calls for half-and-half … wonderfully creamy half-and-half … not exactly Weight Watcher friendly.  Have you ever tried fat-free half-and-half?   I have used it in other recipes … even corn chowder … it works well and tastes good.  So … for the first time I used it to make lemon ice.  The results … wonderful … at least in my opinion.  Of course the real stuff is excellent … but my waistline needs all the help it can get.

The real inspiration for making this is … it is summer … it has been hot in southern California … we finished picking all the lemons off the tree … I had fat-free half-and-half in the fridge … and actually had ripe berries on the vine!

This is what you will need … lemons, sugar and fat-free (or regular) half-and-half … a zesting tool and a reamer are helpful …


Stir together the half-and-half and sugar until the sugar dissolves …

Zest your lemon … then juice it … I used 1 medium  and 1 small lemon (I have Meyer lemons which are very juicy) …

Stir in the lemon juice and zest …


Pour into a shallow 9″ x 13″ pan … cover tightly … pop in the freezer … try to wait patiently for 4 hours …  cut in squares or scoop …


Creamy Lemon Ice

2 cups (1 pint) half-and-half or fat-free half-and-half

1 cup sugar

1 tablespoon fresh lemon zest

1/3 cup freshly squeezed lemon juice

Berries (optional)

Stir together the half-and-half and sugar until the sugar dissolves.  Stir in lemon juice and zest.  Pour into a shallow 9″ x 13″ pan.  Cover tightly.  Freeze at least 4 hours.  Cut in squares or scoop.  Serve with berries if desired.

Visit Gooseberry Patch for more Sweet Treats!

Pancakes … that will melt in your mouth

Pancakes … or should I call them “mancakes”  for Father’s  Day?  I made these for Sunday breakfast a few days ago and will probably make them again on Sunday, Father’s Day.  Pancakes are the most requested breakfast by my hubby … at home or in a restaurant.  Of course if it’s in a restaurant he usually eats the pancakes and then tells me that they were not as good as my pancakes … flattery wins every time!

Many years ago I always used a boxed pancake mix … then one day I opened the cupboard and there was no mix!  So I opened up my trusty “Better Homes and Gardens New Cook Book” … that is actually very old … and made their Favorite Pancakes.  They were very easy to make and tasted good.  Why did I ever buy pancake mix? … I don’t know.  I made them for several years … then I made a discovery that made these pancakes even better … a secret ingredient!  This discovery was made by accident … I purchased a “different” baking powder … aluminum-free baking powder.  It made the pancakes even better … lighter and fluffier.

Use a large mixing bowl and whisk the flour, sugar, salt and baking powder together …

In a separate medium bowl … beat the eggs (oops, I forgot), then whisk in the milk and oil …

Now pour the wet mix into the dry mix … whisk together until moistened … there will be small lumps … it’s OK … let the batter rest about 10 minutes … preheat the griddle to  350° (electric) or till hot … set the table … warm the syrup … have a cup of coffee …

While you were fiddling with the griddle and everything else … look what happened … the baking powder went to work … the batter expanded …

Remove the whisk … the batter is way too thick to use … using a spoon slowly stir while adding more milk (1/4 to 1/2 cup – maybe more) … until the batter reaches the consistency of cake batter … the batter will “deflate” … oil the griddle if you like a crisp or crunchy edge on your pancake …  pour about 1/4 cup of batter per pancake …

Let the pancakes cook until bubbles form … pop … and remain open …

Now flip them over … feel the top of the pancake … it should feel firm … when the firmness is gone and the bottom is golden … they are done and it’s time to eat …

Serve hot … with butter (if desired) … and warm syrup!

Pancakes

2 1/2 cups unbleached flour (or all-purpose)

2 tablespoons alluminum-free baking powder

2 tablespoons sugar

1 teaspoon salt

2 beaten eggs

1/4 cup canola oil

2 1/4 – 2 1/2 cups milk

Whisk together the dry ingredients.  Combine egg, oil and 2 cups of the milk.  Add the wet ingredients to the dry ingredients.  Stirring until moistened, but will contain lumps.  Let rest about 10 minutes.  Slowly stir in more milk until desired consistency (like cake batter) is reached.  Pour 1/4 cup per pancake on preheated griddle.  Cook until bubbles pop and remain open.  Flip and continue cooking until done.   Makes about 16 4″ pancakes.

Favorite Peanut Butter Cookies

It is no secret that peanut butter is a favorite in my home … after all, I married The Peanut Butter Addict …  he is also a cookie monster, but not blue and furry … and we have three cookie monster sons.  I have baked a lot of cookies over the years … and I mean a lot!  This recipe is one that I grew up with … my mom used it when I was a little girl (about 100 years ago).  These cookies are one of my family’s favorites.  They are just plain old-fashioned peanut butter cookies … nothing fancy.  I have tried other recipes … and always come back to this one.  Last month I shared a different peanut butter cookie recipe with you … it too is good … but this is the family favorite.

Let me show you how “well used” this recipe has been over the years.  When I got married and moved out, my sister wrote this copy for me … it has obviously had a hard life … the measuring spoons and cups are from the 1970’s also …

   Considering that this started as one piece of paper …        I think it’s time to make a new copy!

This can be done by hand … back in 1973 I did not own a stand mixer … just a large bowl and a wooden spoon.   Using a large bowl, add shortening, white sugar and brown sugar … cream until very soft …


Add eggs and vanilla … beat until well blended …


In a separate bowl, whisk together flour, baking soda and salt …

If your bowl cannot accommodate all of the flour (without causing a flour explosion) … add 1/2 of the flour mixture to the wet mixture … mix … then add the remaining flour mixture … mix well …


Roll dough into balls … about the size of a walnut … place on a parchment lined or greased baking sheet … use a fork to flatten cookie slightly in a criss-cross pattern … dipping the fork in water helps prevent sticking …

Bake … cool … consume …


Peanut Butter Cookies

1 cup sugar

1 cup brown sugar

1 cup shortening (Crisco)

2 eggs

1 teaspoon vanilla

1 cup peanut butter

3 cups flour (I use unbleached)

2 teaspoons baking soda

1/4 teaspoon salt

Cream shortening and sugars until very soft.  Add vanilla and eggs, beat well.  Add peanut butter and mix well.  In a medium bowl whisk or sift together flour, baking soda and salt.  Add dry ingredients to wet mixture and mix until well blended.  Roll dough into balls about the size of a walnut and place on a parchment lined or greased baking sheet.  Using a fork dipped in water, slightly flatten dough ball in a criss-cross pattern.  Bake at 350º for 11-13 minutes.  Let cookies set on baking sheet for a few minutes for a few minutes before removing to a cooling rack.  Makes about 4 dozen.

Spicy Salty Sweet Pecans

I like to give gifts that are useful … or edible.  I found this recipe on Martha Stewart’s website www.marthastewart.com/recipe/spiced-pecan-hostess-gift  There is even a link to print out recipe cards that I attached to my bag of pecans.  http://images.marthastewart.com/images/content/web/pdfs/pdf3/tvs8847_spicedpecans.pdf

One time I made these nuts and accidentally forgot the cayenne!  I still liked them … just not as spicy.  This recipe is very flexible … you can easily adjust the spiciness and saltyness.  With Father’s Day around the corner … these could make a nice gift.

This is what you will need … unsalted pecans, pure maple syrup, coarse salt, crushed red pepper flakes, chili powder, cayenne and chili paste …

Mix all ingredients (except pecans and 1 teaspoon of salt) … then mix with pecans …


Spread nut mixture on parchment lined rimmed baking sheet … and bake …

Remove from oven and toss with remaining salt … let cool


Now package up for a pretty spicy gift!!!

Spiced Pecans

4 cups unsalted pecans

2 tablespoons pure maple syrup

4 teaspoons coarse salt

1 teaspoon crushed red pepper flakes

1 teaspoon chili powder

1 teaspoon cayenne

1 teaspoon chili paste (from the Asian food section)

Preheat oven to 300º.  Line a rimmed baking sheet with parchment paper, set aside.  In a small bowl, mix syrup, 3 teaspoons of the salt, red pepper flakes, chili powder, cayenne and chili paste.  Pour over pecans and toss to coat.

Spread nuts in a single layer on paper lined baking sheet and bake for 20 minutes.  Remove from oven, toss with remaining teaspoon of salt and let cool.  Serve immediately or store at room temperature in an airtight container for up to 1 week.

…………………………………………………………………………………………………………………………………………….

When my friend’s parents came to visit her from India, they were so nice to bring several whole nutmeg for me.  As a thank you, I made these pecans for them.  Yesterday, I received this beautiful plate as a thank you for the pecans!  I am very fortunate to have such generous friends.

Ladybug Cupcakes …

I am sorry for not posting anything for a while.  I was out-of-town … no internet access!  Now I am home and back in the swing of things.

Several weeks ago I was asked to make some cupcakes for a gathering of family and close friends.  I chose to make a very easy flower with a little ladybug on it.  Let me tell you why ladybugs …

Our sons grew up with a neighboring family’s sons … they are extended family, not  just friends … the neighbors’ oldest son married and had two daughters.  The younger daughter was named Kaitlynn … which became Katie … which became Katie Bugs … and ladybugs are Katie Bugs.  In honor of Katie … these are really “Katie Bug Cupcakes”.  Katie has been gone a year now … but whenever we see ladybugs … we think of Katie Bugs.

There are several new things that I learned while making these cupcakes … I had bought some cupcake papers that were a very different size … a small diameter and rather tall … so I “helped” them fit my cupcake pans by flattening out the bottom … I used a glass … now bake your favorite cupcakes …

The ladybugs can be made in advance … I used Peanut Butter M&Ms because they are bigger than plain M&Ms and flatter than peanut M&Ms … using a marker for food (Americolor Gourmet  Writer) just draw ladybug markings … and let dry for a few minutes before handling them … but I decided that these little ladies needed to see … so I gave them eyes using melted white chocolate and a toothpick …


Now for the cupcakes … make your favorite icing … color about 1/2 cup of the icing green (for 24 cupcakes) … place a star decorating tip (I used #199) in a bag and fill it with white icing … place a leaf tip (I used #352) in a bag and fill it with the green icing … have candy flower centers ready for use …

Make a swirl flower , or I like to call these “fried egg flowers” … start at the outside edge and work your way toward the center … add a candy for the flower center … I used very large edible confetti … yellow M&Ms could be used if the Peanut Butter Addict that you are married to did not eat all of the leftover M&Ms! … OK, I admit that I helped him … I will plan better next time …


Add leaves by holding the tip so that it looks like a bird’s beak … squeeze the bag … then release pressure as you pull away from the cupcake …

So that is how to make a Katie Bug cupcake …